Install ddrescue and recover data in Windows
Credit to phatboyj on stackoverflow for the script to list device paths in Cygwin.
-
First, we have to install a package manager for linux programs called
Cygwin. Download it from https://cygwin.com/setup-x86_64.exeRun the installer and follow the prompts–you can leave all options as their defaults. (You can specify a different folder on the
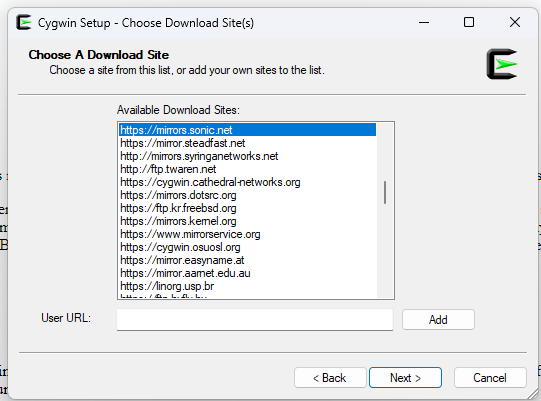
Select Local Package Directoryscreen if you want to store the installer files somewhere else than your defaultDownloadsfolder.)- On this screen you can pick any mirror.
When you come to the
Select Packagesscreen, switchViewtoFull, typeddrescuein theSearchfield. To the right ofddrescue, under theNewcolumn, drop down the field that showsSkipand select1.28-2and clickNext.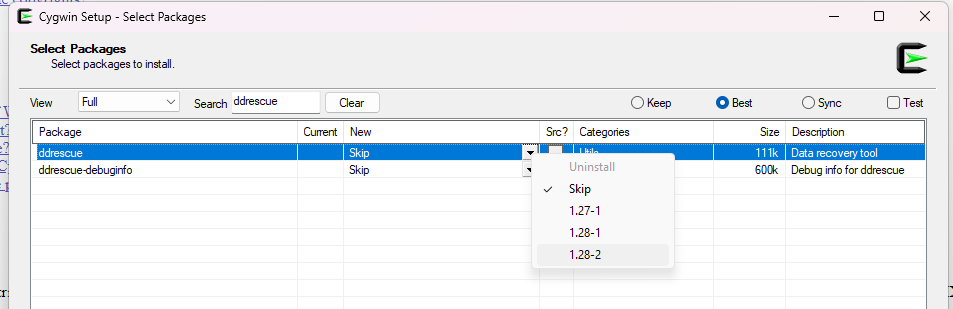
Click
Nextagain to start the installation process and then clickFinishonce complete (you can uncheck the options to create icons if you want). -
Next we’ll need to determine the identifier for the disk to be rescued. Open Windows Explorer (
🪟+E)and note the drive letter.
Open a terminal by pressing
🪟+Xand click onTerminal (Admin). Run the following command. (If you installed Cygwin to another location, this command will be the full path toCygwin.bat)C:\cygwin64\Cygwin.batIn the Cygwin prompt, run the following script.
for F in /dev/s* ; do echo "$F $(cygpath -w $F)" ; doneMake note of the
/dev/s*path for the drive letter of the disk to be rescued. In this example, we are rescuing the opticalD:drive and the device path is/dev/sr0
End the Cygwin session by running the command
exit -
Now we’ll run
ddrescueusing the device path we noted previously.Run the following command. Specify the device path (
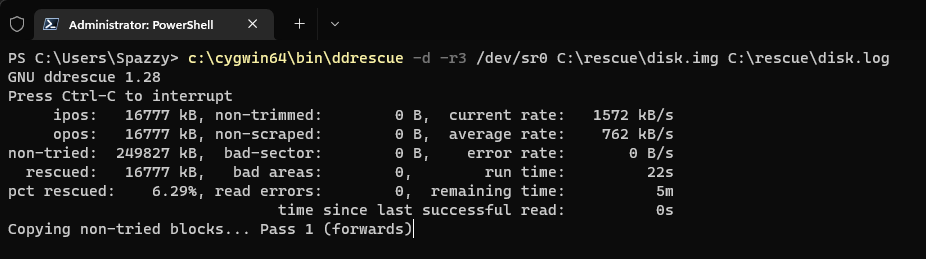
/dev/s*) identified from the previous script and destination image file path (standard Windows path). It is also recomended to specify a logfile path in case the operation is interrupted (it can resume if the same command is run with the existing logfile specified). Take care to not save the image file to a path on the disk being imaged.c:\cygwin64\bin\ddrescue -d -r3 [/dev path] [output image path] [logfile path]
In this example, /dev/sr0/ is our input device path, and we are saving the output image to C:\rescue\test.img along with a logfile.
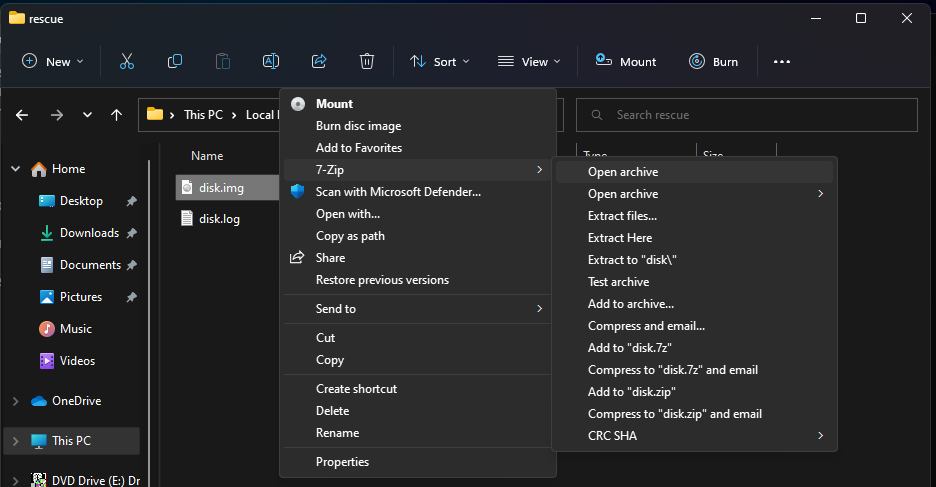
With the saved image file, you may now use other tools to mount or extract files from the image. In this example, we imaged a CD-ROM disk and the image can be opened or extracted with 7-Zip or natively mounted in Windows.